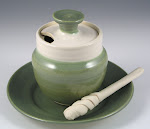
Last week's honey jars were bone dry. It was time for them to get their surface designs. Instead of drawing on the pots, I decided to make raised designs on them.
That started with a pencil drawing. If you know me by now, you know that's probably leaves and stems to start, then random this and that as I go on. So it went today.
The pencil drawing areas got a coating of shellac. I used amber-colored shellac, so I could see the design outlines clearly. I brushed on two coats for a tough, durable shell.
Shellac dries pretty fast on bone dry pots. In 15 minutes, the honey jars were ready for sponging. A well-wrung little sponge wiped round and round the jar cleaned off a superficial layer of clay everywhere except where shellac had been brushed on.
The whole point of this exercise is, the shellacked areas stand out. They are raised from the slightly eroded, wiped surface.
You can see the raised designs of grass, leaves, those Cheerio kind of circles... They really have texture.
The shellac burns off each honey jar completely in the kiln, leaving the entire piece
the same uniform white when it comes out of the bisque kiln (the one where pots are changed from raw clay to bisque ware). These pots will then be ready to be glazed with colors and fired again.
Looks like I have a new craze for the moment. This was waaaay fun. My nephew Yoni took some short video clips of the process, and I want to put them up on my website once I have shots of the glazed, finished honey jars.
Subscribe to:
Post Comments (Atom)


Gorgeous!!!
ReplyDelete